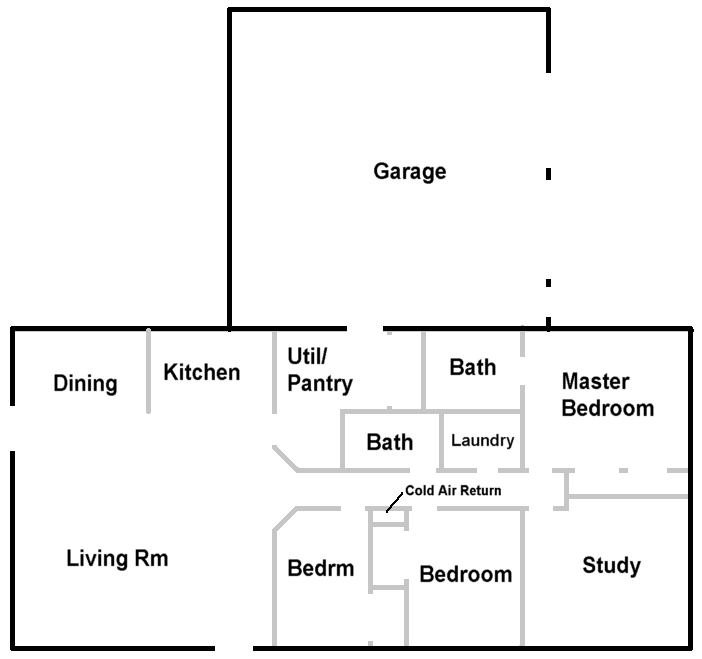
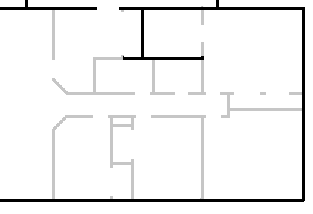
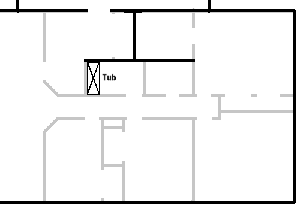
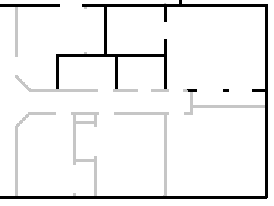
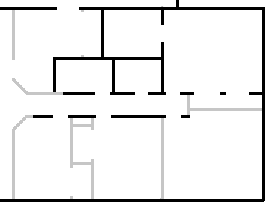
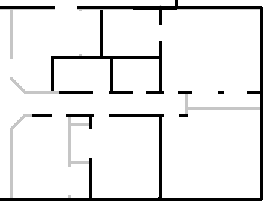
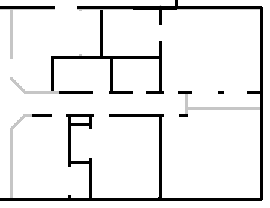
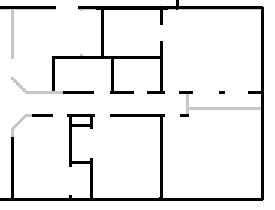
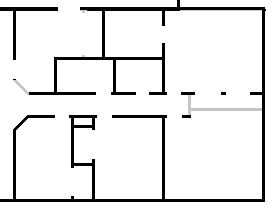
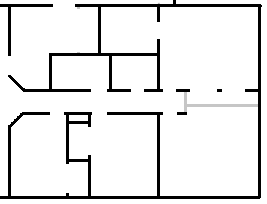
 1. To (dis)orient you here is a floor plan. Note that most of the inside walls are
gray--they haven't been done yet.
Written: Thursday 27 March 2003
Well, the house was for the most part buttoned up. There's a bunch of little stuff to worry about, but most of it has to do with caulk and paint, and those are warm weather activities.
So as I said last time, it was high time to turn this upholstered barn into a house. First step is to put in the framing for the interior walls. This job is not quite done (there are some details to be cleared up) but everything that is left to be done on it won't show well in pictures anyway. And I am ready for things like heating and gas lines.
Progress on this phase was annoyingly slow--I had a lot of distractions to deal with and it seemed like just as I was finally on a roll some wiseguy would turn the sun off for the evening. Something about days being shorter in the winter to conserve solar energy, I suppose. Although I rigged up lights it was still not as good as working in daylight-for one thing it seems like those worklights are always shining right in your eyes. The other factor was cold weather. It seemed like this winter it was good at showing up on weekends. I guess last year I was lucky.
Anyhow, to put a section of wall up, you need a piece of pressure treated lumber on the floor (just in case water spills in the house, you don't want it wrecking your walls) and then 2x4s for the wall studs and the top plate. One disadvantage here is that although they sell lumber just the right length for the outside walls (92 5/8 inches), they don't for this activity. (Outside walls have two plates on top, the inside walls only have one--but the walls need to be the same height.) The lumber needs to be an inch and a half longer so you need to buy 96 inch lumber and cut it down to 94 1/8 inches. Once you've done all of this, you nail it together, tip it up and discover that the trusses aren't quite flat and neither is your floor. So you shim between your new wall and the trusses, and use masonry nails to nail the wall to the floor (took me a while to get the hang of those), and regular nails to attach it to the trusses. And don't forget to make sure the wall is plumb (i.e., perfectly vertical)!
Back when I was framing the outside walls of the house I discovered that the pressure treated wood tended to warp really badly, almost immediately. So I now call it "insta-warp". I tried never to have more than a handful of pieces of this stuff at any one time because if I bought some and didn't use it for a few weeks, it might be warped by the time I got to it. Of course the regular lumber wasn't much better. At the lumber store it seemed most pieces had a "crown" or "crook"; two words meaning the same thing, where the lumber is bowed in exactly the wrong way (so that the curvature is in the 4" direction instead of the 2" direction). (For some bizarre reason few pieces had a "bow" where the curve was in the 2" direction--those are actually usable as studs if the bend isn't too bad.) You can't use crowned pieces in a wall; they will bulge out. So one recurring challenge was locating pieces of wood that were straight enough to be used. I wonder why they don't grow trees straight any more. Actually, I am told this is a problem because most wood is out of trees that are deliberately grown very fast, which affects the grain of the wood. Old growth lumber isn't like this but gives the environmentalists a hissy fit.
 1. To (dis)orient you here is a floor plan. Note that most of the inside walls are
gray--they haven't been done yet.
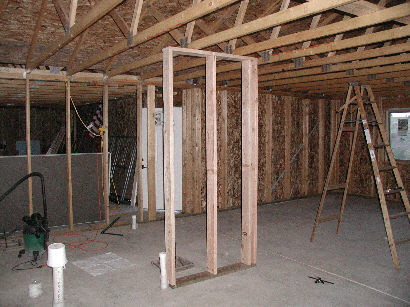
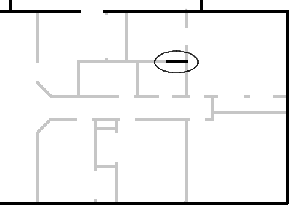 2. This was the weekend before the Christmas shutdown where I work (it's nice but comes
at the cost of a lot of the three day weekends many places have). I did a lot
of surveying on the floor of the house to figure out exactly where things were going
to go. I shifted a couple of walls an inch or two to match where the waste plumbing
ended up (but to my relief found that there would be no danger of having to put the
toilet in the hallway).
Then, finally, I managed to put up a short section of wall. The section is short because there is a vent pipe in the way--these are the parts of "Sherwood forest" that end up inside the wall because they eventually work their way through the roof so that air can move around inside your pipes when you run water down a drain. This particular wall will have a lot of plumbing in it and is 6 inches thick instead of the usual four inches, as a consequence. It's known as the "wet wall" although there are two others that will have plumbing in them.
Well, I was hoping to have a lot of this done over the Christmas shutdown. But there was Christmas itself, and some bad weather...
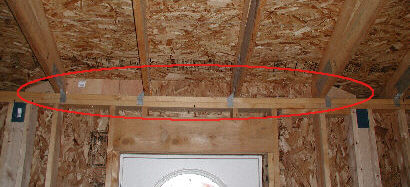 3. Anyhow, on the 26th I got another little section of that wall done, but I discovered
that pigeons liked to live in my house at night. I found this out by doing that little
bit of wall at night. I was rather surprised to hear the birds moving around when I
walked in. I know there are mice in the house too but I hardly ever hear them. I
couldn't chase them out though, even with the front door open. Since I don't speak
pigeon English I couldn't reason with them either. So on the 27th I filled the
opening under my porch cover, as you can see here. No more pigeons. I felt vindicated;
they obviously found it fit for occupancy before our Regional Building Department did.
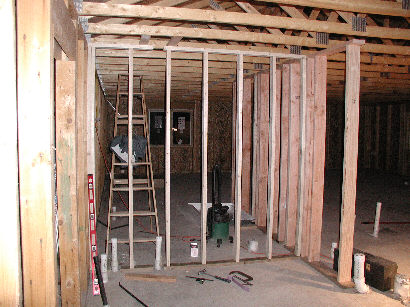
 4. I also managed to make some more progress on the walls that day. Another short section
of the wetwall, then the wall between the utility and the master bath room. You can
see two more vent pipes in the wall (right in front of the ladder). Over on the right,
through the utility wall, you can see another interruption in the wet wall but you can't
see the pipe that it is for.
The white square you see in the background is the bottom of the shower that will be in the master bathroom. It hasn't been installed yet (and still hasn't), but I needed to see exactly how big it is.
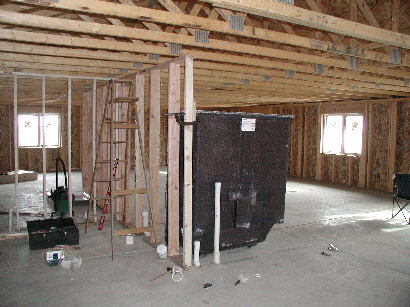
 5. More crawling progress. Another little section (the last) of the wet wall. And a tub
has now been set in place. Tubs and
showers get nailed directly to the wall studs, so in order to put the three walls around
the tub you need to know the size of the tub, and the best way to find that out is to
actually have it there.
Incidentally, this is the second tub I purchased. The first one, which I bought on December 15th, flew out of the back of the truck--the rope holding it in was frayed and broke. Luckily no one was behind me on the highway or they might have been killed as this gigantic thing went into their windshield. The flying bathtub is now sitting just north of my house until I figure out how to break it apart so I can take it to the dump as part of a larger load of stuff.
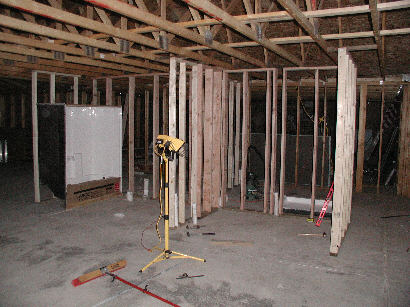
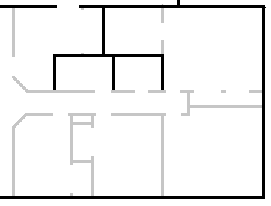 6. Finally I got a decent number of walls done--the one back of the tub, the one between
the bath and laundry room, and the one between the laundry room and the master bedroom.
At this point I can't do the last wall on the bathroom, because the tub needs to be installed,
as opposed to just sitting in place. The drain needs to be connected (tricky) and the tub
nailed to the studs.
This is all of the walls that have annoying breaks in them because of waste plumbing. So things should get easier, at least in theory. Oddly enough, I haven't built a single doorway yet.
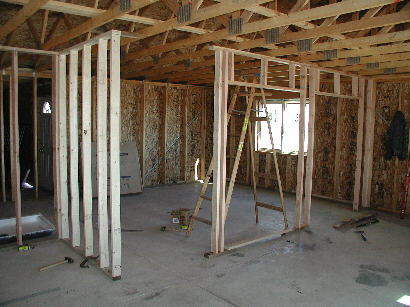
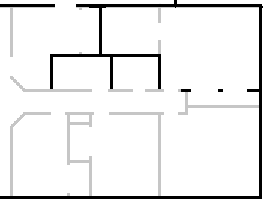 7. And now to start on the "great wall". There is a forty foot long wall in my house.
But it's not obvious because once the house is done you won't be able to see all of it at
once. But here is the start of it, and the first doorways--and it turns
out they take up just as much time as working around waste plumbing.
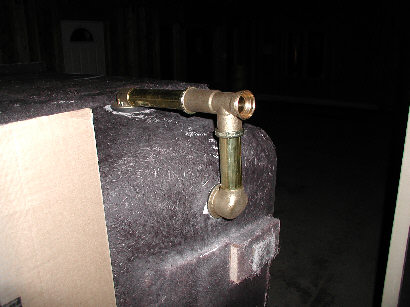 8. This weekend was given over to getting the bathtub connected. Before doing
anything the tub had to be tipped over to get it out of the way. Then there was
work to be done under the floor of the house. I had to dig out four buckets of dirt
from the square hole in the concrete, to find the drain pipe and clear out enough
room around it to connect the P-trap. Then Tom and I actually glued on the P-trap.
I later connected the brass drain parts to the tub itself. That's what you see
here.
Since the brass drain stuff will extend below the floor, I can't set the tub on it's base now--the drain stuff will hold it up. This could put a lot of stress on the fiberglass and crack the tub. One destroyed tub is enough, thank you! So there was no point doing anything with this until we were ready to connect the part under the floor with the parts attached to the tub--so it sat here on its side for a week.
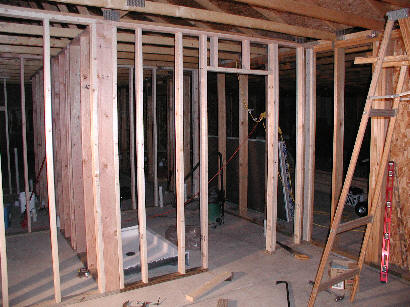
 9. I was frankly a bit frustrated with the fact that for varying reasons, most of them
completely my fault and the rest due to weather, I was only managing to get about four
hours' worth of work done each weekend. So I actually went out on Monday evening
and put up another wall, this one the one between the master bath and the bedroom.
My first regular door, and the first room that is complete (except for a small wall
to enclose the shower--which still isn't done).
At this point I really couldn't build any more walls--the tub was still tipped over and in the way.
I ended up with an interesting lighting system--one light is clamped to the garage ceiling over the saw I used to cut all of this wood, another is the worklight you will be seeing in some of these pictures. At first I had to carry the worklight back and forth to the garage to cut wood--and since it was the only light I had I would have to unplug it and walk in the dark. Yuck. Anyhow, I only put up with that on the night the pigeons were in the house. By the time this picture was taken I had the two lights and it was much easier. From this point forward I often worked till 8 at night or so.
 10. So now the tub is installed--the drain is connected and it has been nailed to
the walls. This made it possible for me to proceed with the Great Wall.

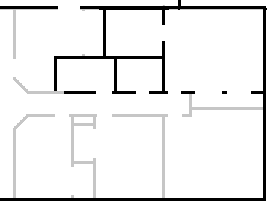 11. Now most of the "great wall" is done. Even part of the third wall around the
tub is done. The rest would get done much later.
From this point forward it's just walls to do and things like tubs, etc., won't interfere.

 12. What a novelty--I get work done on a Saturday! This time it's the south side
of the hall. Or most of it anyway. I was avoiding the very west end of both
hall walls because I didn't know how big a piece of the corners I wanted to cut
off with those diagonal walls. I had to decide how much room I wanted for
kitchen cabinets, and add the width of the door between the utility room and the
kitchen. Then I could cut corners (so to speak).
And now for something completely different.
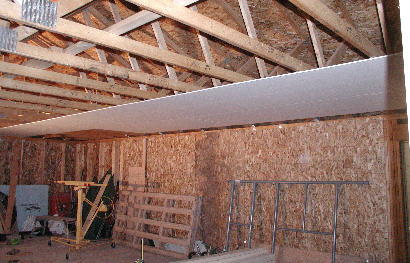
Remember that I never did get the garage doors on? In order to do that, drywall must first be put on the ceiling of the garage--so they can put the rails in. So this seemed like a good day to learn about hanging sheetrock on the ceiling. I rented a drywall jack and Tom gave me some pointers.
 13. Here's the first sheet, looking for all the world like it's going to fall off.
But it hasn't (yet, anyway). It does have about a zillion screws holding it in place.
Those of you familiar with my hairline will realize that's not me in the picture--I was on the other side of the camera as usual. This is Tom.
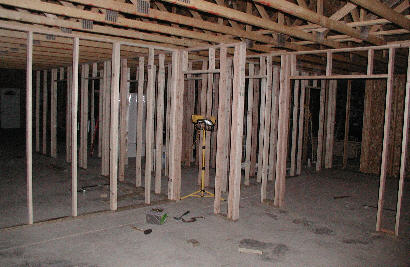
 14. I would have finished the job that evening, so that I would have the benefit of the
drywall jack for the whole job. But it started to snow. I didn't want to get stuck
there, had to do something in town anyway, and couldn't count on being able to come out
early the next morning (like I did the last day I had the nailgun). So this is what I
got done--A bit left over at the north end and an 18" or so fringe near the wall with
the garage doors. You can see the drywall jack itself-the yellow thing with the large
wheel on it.
Well, I suppose I had to make up for actually getting two days' worth of work done that weekend. The next weekend (8th and 9th) I didn't do anything. (And I don't remember why! I think one day was weather.)
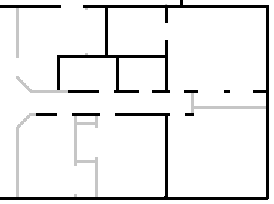 15. But on the 16th I did manage to get the study wall put up.
 16. I also got to fix another problem. In spite of very careful use of a level trying to
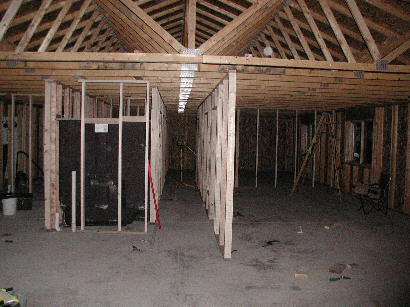
get the walls plumb, I could see problems with the hallway wall. Apparently my level is
only good for about a quarter of an inch in eight feet. (And yes, I did turn it both
ways.) The top of the south hall wall zig-zagged because the error was to the north in
one place and to the south at another. (The floor was straight because I had a chalk line
to guide me.) I used a plumb line to straigten the wall out. If there is no wind a
plumb line should be good unless someone really heavy with their own gravitational
field walks by.
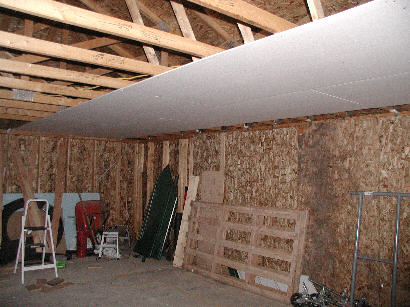 17. I also got part of the remainder of the sheetrock done--I was able to use clamps to hold
some 10' boards in the right place, and with the help of Mike and Lidia (yet another couple
of people who were around at the wrong time from their point of view) got the sheetrock
up between those boards and the trusses. Then I could screw the sheetrock on. Didn't work
as well as the jack. That took care of the 4 x 8 piece. Later that evening I got the
remaining 4 x 4 piece. The remaining sheetrock is narrow 18 inch strips which should be a
lot easier to deal with.
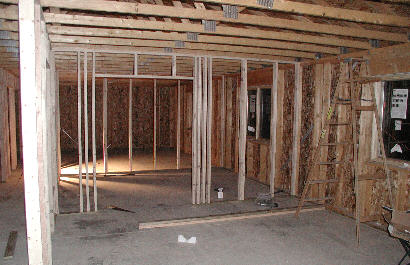
 18. Another Monday trip, inspired by my frustration at how long this seemed to be taking.
And it was a most productive day. That rather complicated looking mess between the two
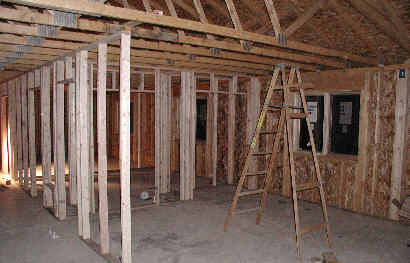
bedrooms got done--though I was there until after midnight, doing it. This first picture
shows the bedroom at the west side of the bedroom that's next to the study.
This was an important moment. For some reason, suddenly something went "click" and I could truly "see" the layout of the house clearly for the first time. I didn't have to look at where the window was and say to myself "this is where the bedroom will be," it was obvious. Even for the stuff that wasn't done yet.
I know it's hard to convey but it was a big moment, the more so for being unexpected.
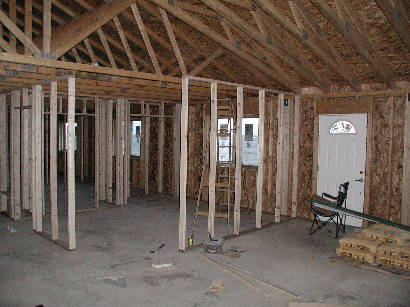
 19. ...and here is the east wall of the other bedroom--kind of difficult to see.
All in all, a very productive evening.
 20. Got very little done this weekend--part of the wall between the great room and the
bedroom.
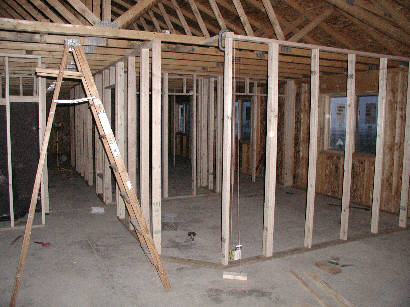
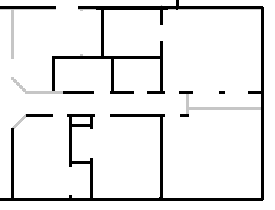 21. Now I have figured out how much of a corner I want to cut, and the walls are up to
the corner. I've even cut the piece of "insta-warp" that will serve as the base for the
45 degree section of the wall; you can see it set in place.
This is the weekend I made one big push and finally got all of this done!
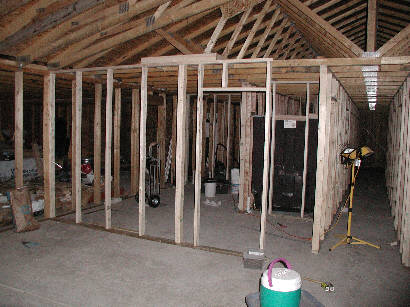
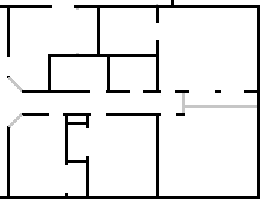 22. Here I've done the walls to the utilty room as well. The only thing missing here is
the diagonal. Also if you look at the top of the wall you will see a part of the future
plant shelf. This serves not only as a plant shelf but helps anchor the wall to the trusses.
These walls are out in the great room, under the scissor trusses.
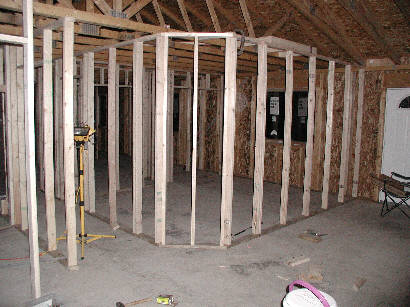
 23. Now here is the bedroom diagonal. The interesting thing is that there's really no way
to nail it to its neighbors on top. The plant shelf will hold it in (and you'll note part
of that is in place here as well).
Note that the utility room diagonal is still not in place. Once it is in, I have to walk through a doorway to move lumber into the house. And I still haven't done the wall between the master bedroom and the study.
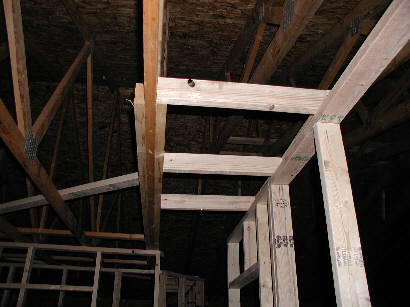 24. Another view of the plant shelf--from underneath.
One more trip to the lumberyard. I was able to find just enough straight wood to finish the job.
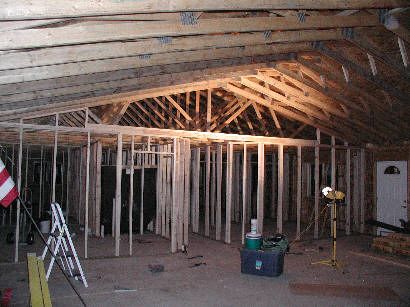
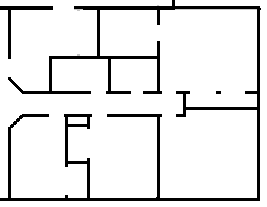
 25. Now the last diagonal is in and the plant shelf is completely done. You can see it
runs over the "funnel" opening to the hallway.
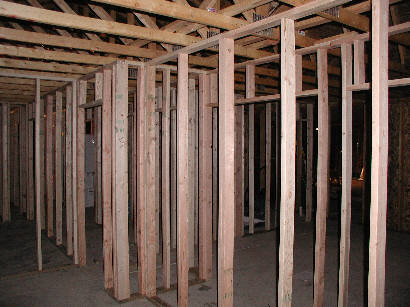
 26. And last but not least--the end of the hall and the study. Hooray!
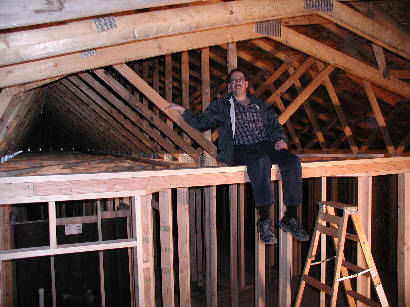 27. After all of this I got to climb up on the plant shelf and get a picture taken (this
was actually a few days later). Actually there is a bunch of "detail work" to be done
before I can say I am truly done with framing the walls--there's the shower in the master
bath, that will need a little 30 inch wall on the third side once it is in. I have to
finish nailing in the tub. And every section of wall that runs north-south needs a 2x6
nailed along the top, so the ceiling sheetrock can be nailed to it along the edges.
But none of this will interfere with putting in gas, plumbing, heating and electricity-- the stuff that needs to go inside the walls before I can put the sheetrock on them. So I press on, and I will fill in the details here and there.