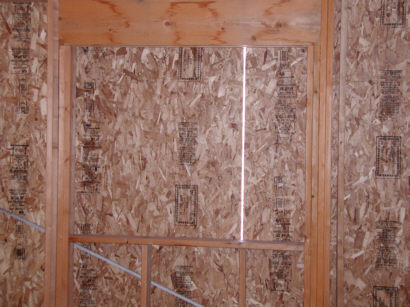
 1. Here is a picture of the window before any work was done on it. I had to cut a big gaping
hole in my "plywood box."
Written: Sunday 29 December 2002
Last set of pictures showed me getting the major sheet, I mean the major sheet metal work done on the roof. It was then time to put the windows, siding, and doors in.
There are a variety of things that go into putting the outer skin on the house, some of which have to be done simultaneously. For example, you might not think windows and siding need to go on at the same time but they do.
Not to mention the catchup. After all, I didn't actually finish the roof last time, I just got it done enough that the house was reasonably water-tight. As long as the wind wasn't blowing the rain sideways.
And--truth to tell--I am still not done with the outer skin of the house. But it is done enough that I can start working on the inside.
In essence there are several major steps involved, not including leftover work from roofing.
Steps 1-4 pretty much have to be done at the same time. You don't want to cut out your window holes until you are just about to put the windows on. You don't want to nail your foamboard siding on until you are ready to cover it--the wind might rip it off. Et cetera.
You'll see the upshot of all of that in the very first set of pictures. I didn't really know what I was doing, but I knew the most complicated parts of the siding would be where there were windows. The north-west wall of the house, very short but with a window in it, would be an ideal learning experience. So I recruited (actually, "hired") my friend Tom to show me the ropes.
 1. Here is a picture of the window before any work was done on it. I had to cut a big gaping
hole in my "plywood box."
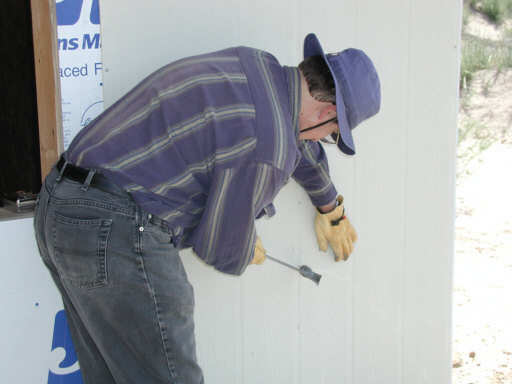 2. Now I have put on the foamboard and I am nailing on the siding. (You can see the hole for the
window at the far left.) The foamboard is 1 inch (2.5
cm) thick, R7.2 stuff that unfortunately cannot be allowed to get wet. The siding is a concrete
fibermesh. It won't rot, attract bugs, or burn. It is also very heavy. The first panel on any
length of wall had to be carefully placed so that it would be truly vertical. This was a two
person operation just because it's hard to exert that kind of precise control on something that
heavy. Actually any full-size sheet of the stuff was a two-person operation until I got
the hang of it. Much later, though.
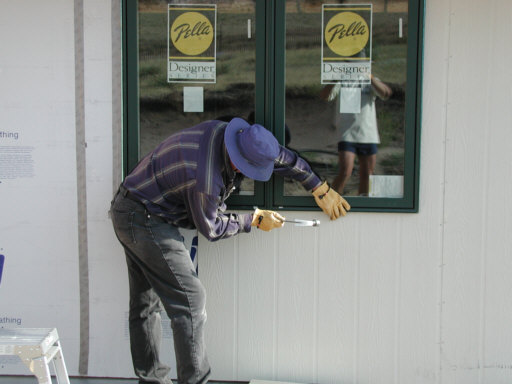 3. Now we've put the window in, nailed it through the foam board into the wood, and duct-taped
it all the way around (this will help prevent drafts). Now to nail the siding around the window.
At the left side you can see the foamboard, with duct tape joining two pieces.
It's generally a good idea to offset the foamboard edges from the siding edges. It makes it even harder for cold air to work its way in (or warm air out, or whatever). You'll see later that when the day is done half a sheet of foamboard is visible.
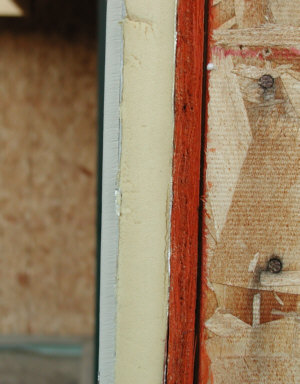 4. Here's a view of the layers. On the left, the siding. In the middle is the foamboard. The
red stripe is the painted edge of the plywood. To the right is the plywood on the west side
of the house.
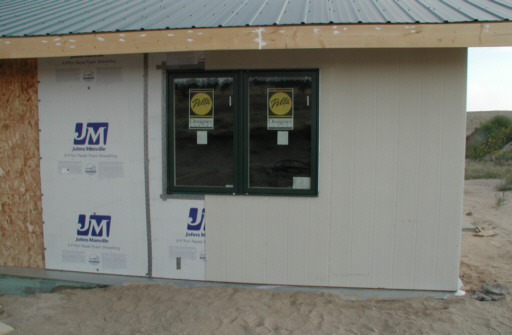 5. And at the end of the day, I've learned a lot. We've even caulked the nails and around the
edges of the window. Caulking is tedious, time-consuming work. And I have been working with
the philosophy of trying to fill the bigger holes before worrying about the smaller ones.
In other words, I have, as of today, probably caulked about 1/4 of what I need to caulk. Since
it needs to be 40 degrees (about 4 degrees Celsius) for the stuff to work, it might be a while
before I finish it off.
This was the day of the Libertarian banquet so I didn't manage to actually put the next piece of siding on that day even though there was enough foamboard on.
I came out the next day, Sunday, and did a couple more sheets. The first of course needed to be cut to fit around the window (and oh, by the way you need a special $50 sawblade to cut this stuff!), the second piece was a full sheet and I struggled with it--Had to make an emergency call for help while I was trying to hold it in place. You see, I could either hold it in place or hold the nails so that I could swing the hammer--but not both at the same time! But like I said I eventually got the hang of it. Anyhow, not a lot more got done on the 18th.

6. The next weekend I got all the way around the back and side of the garage. I think I
even got part of the front done (the two panels all the way to the right of the doors) but
I don't have a picture to prove it. I nailed up
all of the foamboard, which is really easy to handle, then got help putting the siding on.
I put in just enough nails to hold the siding on temporarily and filled in later.
I even got the two partial pieces inside the corner between the house and the garage.
Also not very glamorous but I did manage to put primer on part of the fascia board by this time. (That's the white area above the window.) The goal, of course was to actually get them painted.
I am not sure precisely when I did most of the rest of the garage wall but of course it was fairly easy with small pieces of siding. By the next weekend (31 August and 1 September) a good part of it was done, as you will see.
Now for the tricky part--getting the siding up onto the gable ends. It was a lot of fun working with the plywood, which was only half as heavy and which you could freely drive nails into to hold other pieces of wood to help you put up other plywood. But for this... Well, once a piece of siding is up, you have to leave it alone.
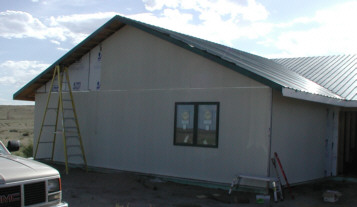
7. This was pretty much a three person job. We used ropes, pulleys and hooks to lift the pieces into
place and then nailed them on. I had the help of Mike Fay and Tom Simard (another co-worker of
mine).
You can see more primered fascia board in this picture.
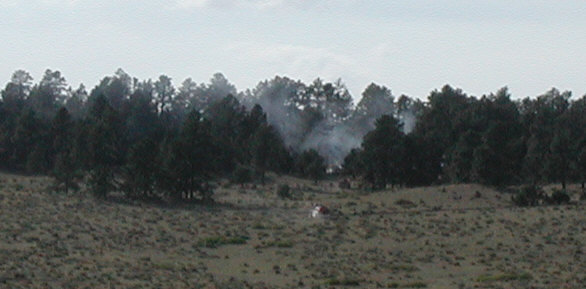
8. It was a bit frightening to realize that there was smoke coming out of the forest. As visions
of the disastrous Hayman fire danced through my head, the fire department--actually
several fire departments--came out and squelched this one. I found out later this
was a re-kindle of something that started when lightning hit two days earlier.
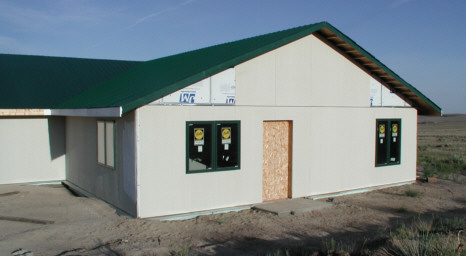
9. The next day we worked on the west end of the house. On both days my friends helped me get the
really large pieces up. They left when we got to the small ones, since I was able to get
up there myself.

10. Looking back on this I am not sure what I did this weekend. I didn't take any pictures on the
actually weekend days, but did on the following Friday (the 13th). Based on those pictures,
which you see below,
I must have worked on painting fascia. I also put in the small gable pieces. I think at this time
I also put the people door in on the garage. That's another one of those jobs that can be done
by one person, if the wind isn't blowing the wrong way or something like that, but I much preferred
two.

11. This picture is notable because, by golly, it finally looks like a house!
(Just ignore the fact that there is a piece of plywood where there should be a door....)

12. One more picture from the 13th--it shows the last side of the house that needed siding. The south
side has six windows and one door. (By the way, one window on the north, one on the east, two
on the west and six on the south makes a total of ten windows or "X Windows" for you UNIX geeks.)
It's notable that the porch still is not roofed. Well, I wasn't going to have any help putting the windows in this weekend--so I decided to take a "stroll down repressed-memory lane" and return to roofing. Albeit really mild roofing with only six foot strips. Beats the tar out of dealing with 19 1/2 foot pieces!

13. Here's a shot when I am most of the way through with the east slope of the porch roof.
Note also that I've put painted fascia boards on the south gable eaves of the porch.

14. Here it is about 1:30 and I've put on all the foamboard for the south wall (with the exception
of one little piece next to the front door). All the duct tape is on, at least anywhere where there
will be a window. You can now see where the windows will be. Now time to go get Tom to help put
the windows in.

Here I am in front of the most annoying of the six windows--about three hours later. It was
the most annoying because there is a hole in the ground below it. This is where the waste
plumbing will someday come out of the house on its way to the septic tank. In the meantime
I have to work around it. (Three boards and a sheet of plywood-still kind of bouncy!) This
is the second window from the right in the previous picture.
At this point Tom helped me get the first piece of siding on at the far left, making sure it was perfectly vertical. After that I spent the rest of the day putting more siding on--having to cut holes for the windows. By the end of the next day I was almost up to the door. Tuesday I came out and got past the door and the next window.

Saturday I finished the siding. Yay! It's now possible to relax a little bit--a very little bit.
The sun is no longer damaging my plywood. However, winter approaches and it's still very easy
for snow to blow into the house. You see, the eaves are still open.
I don't recall precisely when I started working on the soffits--whether or not it was on the 29th. I think it was quite a bit later. Truth to tell, things generally slowed down at this point. I don't have many pictures for the next couple of weeks.
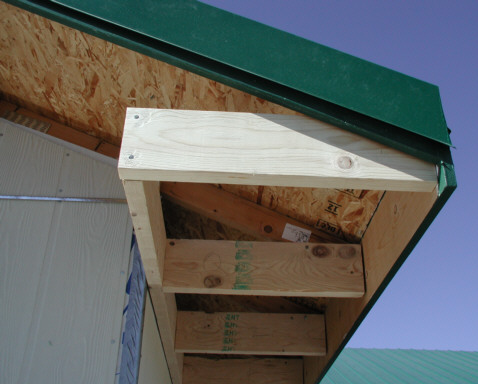
8-17 You are looking up at the north east corner of my roof now. The boards coming from the
side of the house are called "lookouts." In order to seal the hole under the edge of the
roof I have to nail plywood onto these. (Known as "soffits.") Adding to the complication
is that some of the plywood pieces need holes in them so I can put vents in. Hammering
straight up while trying to hold a large piece of plywood steady is not on my list
of "fun things to do" so I decided to rent an air nailer.
I ended up renting the nailer one day a week for this weekend and the next two weekends.
Saturday the 12th I put these lookouts onto the house, but only on the north side. On the 13th, if memory serves, I started at the northwest corner of the house, and went all the way around to the north wall of the garage. I left the very end piece in the NW in the northwest corner off because I was going to need to do a little more work there. In the picture you can see that not only is there a bottom side to the framework, but also a side facing you and another side facing left. For these I planned to use small pieces of the siding. In order to put those on I had to do a little more preparation.
On this weekend also, the front and west doors got put in with the help of my locksmith. But when he went to put the locks on the doors, he discovered that his supplier had sent him the wrong stuff.
Saturday I put the lookouts in on the south side of the house.
Sunday, more soffit work. I think I managed to finish the rest of the garage, the NE corner of the house and do most of the south side. But the most significant thing that happened was that the locks got put on and I could now lock the doors to the house.
The last big hole in the house is the garage doors. Unfortunately before I can put those on I need to drywall the garage ceiling. So, just to keep the snow out, I put plywood over them.
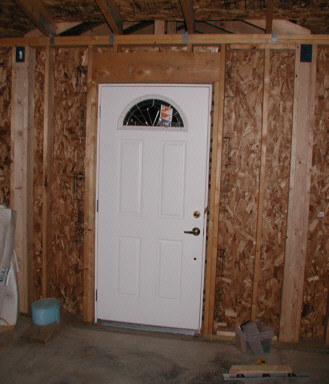
18. Here is a shot of the front door taken Saturday.
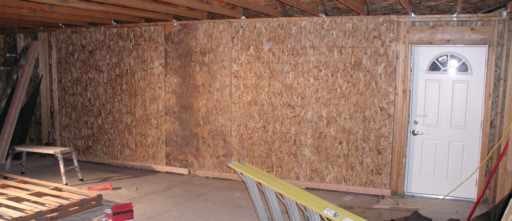
19. And here are the garage doors--plywooded over.
If it seems like I am making a big deal of this, that's because it IS a big deal. I can now leave my tools and materials lying inside the house, and they will not get damaged by the weather and they are now under lock and key. My truck is no longer a travelling tool box. If I decide to take my car out to the house (it gets much better gas mileage) I don't have to transfer all my stuff into the car. This is much more convenient.
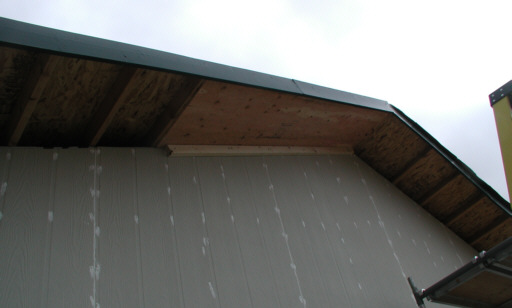
20. Now for the really tricky part. The east and west ends of the house also need to have
plywood nailed onto them. Here you can see one piece in place. The only way to get up there
is on a ladder or a scaffold.
Being on a ladder would seriously limit my mobility. If I found out the ladder was six inches
from where I needed it to be to (oh say) wrestle the plywood into place, I'd have to get down
off the ladder, move it, climb back up... Not to mention the fact that I really don't like
the top parts of ladders. (I'm okay as long as the ladder is steady and I can steady myself
with one hand--but that leaves out the top three or four feet (1 meter or so) of the side of
the house.)
So I bought a scaffold. Sunday I managed to do both of the gable ends.
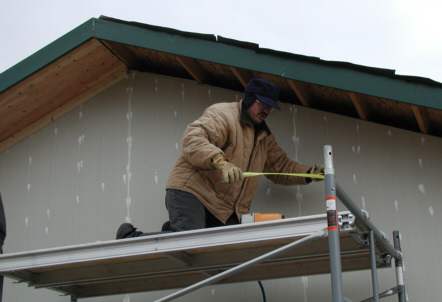
21. One disadvantage of this do-it-yourself-by-yourself approach is that rarely do I have pictures of
me actually doing the work. However some friends showed up and took some pictures of me struggling
with the west end of the house.
I ran out of daylight on Sunday--I was almost done with the east side. I set up the lights and finished under the eaves. But I still had the four corners to do and also the area near the porch. I didn't want to rent the nailgun yet a fourth time, for another $30.
The nailgun needed to be returned by 9 AM Monday. I went out early Monday morning--it was foggy--and did all my cutting first so as not to wake the neighbors. Then I went out and nailed everything.
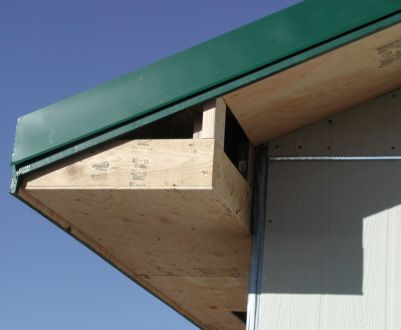
22. Here's the result of my early morning dash to the house: There is now plywood on the corners. You can
see there is now a vertical piece of wood that will hold on the siding.
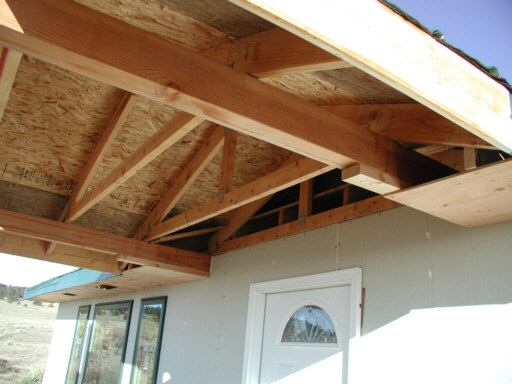
23. And here's a view up under the porch. You can see holes for vents over the living room windows.
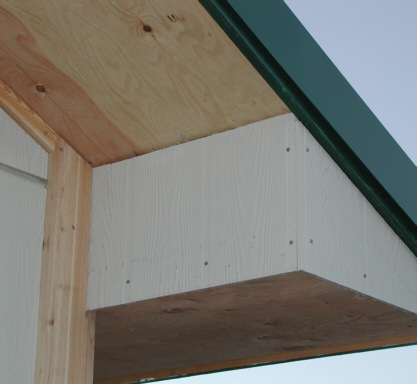
A lot of minor stuff got done this weekend. I put trim up on the corners of the house (as you can see
here) and I also got the siding onto the ends of the soffits. I nailed in some of the vents and did
some caulking as well.
I don't recall for sure what I did the following weekend. I think I might have done the eave flashing that I will talk about below, but I can't be sure. My memory of this is rather fuzzy because it was the last weekend before I really, really shot myself in the foot. Luckily it had nothing to do with the house per se.
Sometime around Tuesday the 12th I decided I was fed up with the flaky behavior of my computer. I strongly suspected some sort of virus. I was going to run an anti-virus program and then if that didn't turn anything up, rebuild from scratch.
The anti-virus program found a "problem" with my boot record and like a complete, utter, absolute, Gomer Pyle-esque IDIOT I told it to fix the problem.
(Someone out there is now laughing because I didn't do backups. Okay, wise guy, how many home users actually do backups?)
The two disk partitions on which I keep all of my data disappeared. Poof!
I took the machine to a data recovery service, since I figured the data was still there--the partition table just needed to be fixed. They found one of the two partions--the less important of the two. Still missing was the partition on which I keep my finances, these house pictures, you name it. Of course the data recovery service didn't do a super-thorough job--they basically just tried to find filesystems.
To make a long story short--I ended up buying a new computer and writing my own software to find the house pictures by simply looking at every single sector on the disk and ignoring the file folders. (The house pictures have a very distinctive format). I found them all right--It was something to look upon a picture I thought was lost forever.
The hard part was going to be finding everything else. But then I stumbled upon all the file folders except the root folder. Then I found the root folder and the FAT tables. I had everything I needed! A few more days of low-level DOS code later, I got everything back. This was on the 10th of December. And here I am writing about it, and even setting up all my old e-mails as web pages.
By the way if anyone wants the full and gory details--just e-mail me. And NO, I don't know why the recovery service couldn't find the stuff. I think I literally told them to look in the wrong place. It would take a LONG time to explain and has nothing to do with building a house so if you really want to know--ask.
Somewhere in all of this I somehow managed to do more work on the house-but not much, and truth to tell, I couldn't tell you what.
Somewhere in all of this I came to a rather annoying realization. You see, I never painted the fascia over the garage and porch. And now it was too cold to do it. And in order to put on the metal eave trim I need to have painted these. The eave trim helps keep the snow out of the house and also makes water run in front of the fascia, not behind it! This is kind of important during the snowy time of the year. So I had to put the stuff on temporarily. Let me explain:
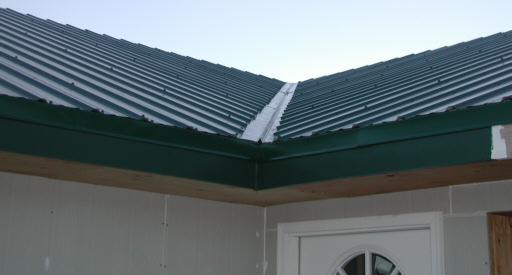
25. Here is a shot of the valley on the east side of the garage. Just below the roof you can see a green
strip of metal, over the fascia board. (I know, green-on-green is hard to see!) This is the way it's
supposed to look.
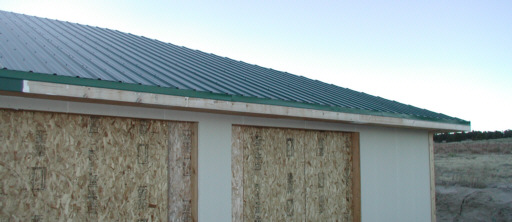
26. Now you can see the same strip of metal over a part of the fascia that is not painted yet.
This part has only been screwed down every few feet--so I can remove it next spring and paint
underneath it.
By the way, you can see that some of the nails on the siding have been caulked and some have not. More stuff that needs a warm day.
This weekend was very important but not in a big spectacular way. The way the roof works, it requires ridgecaps. There is no real protection for the very top of the roof until you put them on. But in order to put those on, you must first have more trim on the gable ends--the slopes up the east and west, because the ridgecaps go on top of these.
Earlier on, I don't know when for sure but I think it was in October sometime, I tried to put the gable trim on and I discovered that my roof had a fine coating of dust on it that made it VERY slippery. But you see, now I have a scaffold. I used it to caulk nails and put up trim on the roof. I then put the gable trim on.
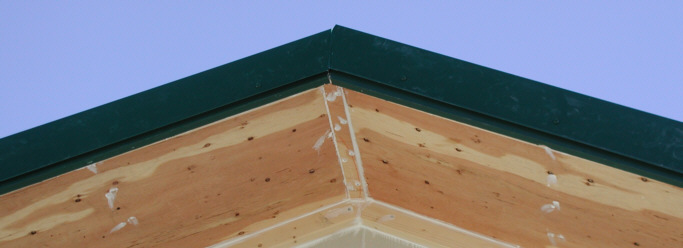
27. Here's what I am talking about. You can see a bunch of caulked plywood, trim and so forth--and also
green metal on top of green-painted wood. So now the ends were done and I could start thinking about
the ridgecaps.
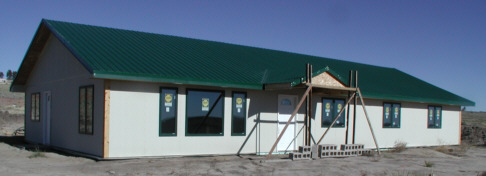


28-30. And now for a re-cap. With all the closeups I have shown you, it's easy to lose the big picture.
Here is what the house looks like--from the Southwest, the Northwest (notice the water tank, which
I never did manage to get buried), and the North East. You can see which fascia boards are painted and
which are not.
This is an appropriate spot for a re-cap because at this time the porch framing got inspected. I didn't quite follow the plans when I built the porch so the inspector rejected it. (I used the wrong kind of beams.) I then got the change approved, and got re-inspected. That time I passed.
I did all kinds of preparation for the ridgecaps--I figured I would throw a rope over the roof peak, and anchor it on both ends. I'd use carabiners and a strap harness. That roof is slippery!.
I discovered, though, that it was relatively easy to climb up the valleys, and that once I was on top of the roof ridge, sliding off simply wasn't going to happen. I did have to sit on the ridge as if I was a jockey and it did hurt my knees a lot. I had to scoot my way forward 18 inches at a time and I was constantly sliding these big pieces of sheet metal along the ridge. In spite of the fact that it was a relatively warm, calm day, I almost lost a piece of ridgecap to the wind. In any case, I managed to get four pieces (out of six) onto the house and two (out of three) onto the garage, on Saturday. I wish I had taken a picture that day because I haven't been able to climb up there since then, because the roof now has ice on it.
Sunday was much windier, and I was sure I'd lose some of my ridgecap pieces if I tried to work that day. Since I would soon be starting on framing the inside walls, I went with Tom to go get the one-piece shower bath. These have to be nailed directly into the wall so you have to put them in as you build your walls.
I pulled my second really stupid maneuver of the season that day. I tied the tub down with a rope but it was an old rope. It broke on the way to the house and the tub blew out. The tub broke, of course, when it hit the roadway, and I ended up buying another one.
Now my roof has ice on it so I still can't show you the ridgecaps from up close. But here are a couple of shots from the ground level.
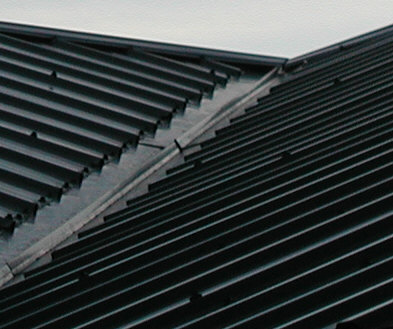
31. Here you can see the valley I climbed and at the very top, the ridgecap. You can also see the ice on the
roof.

32. And here is a shot of the garage roof--you can see where the ridgecap ends. The part that looks a bit
twisted up is actually the foam that goes under the ridgecap.
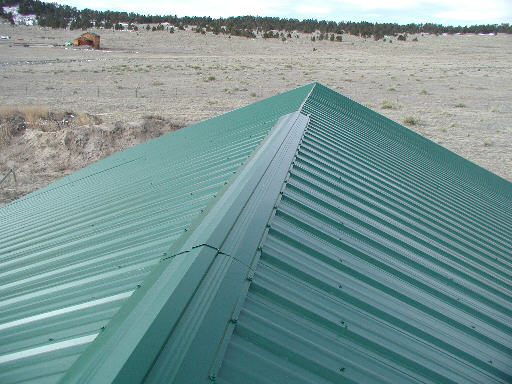
33. Well, finally the ice melted off the roof and I got up and took a picture from the top. This is looking
west from where the garage ridge and house ridge meet.
Also on the 28th I tried doing the hip ridges. Those run diagonally up from the garage corners--so when you are straddling the ridge you can still slide off. I rigged up an elaborate system of ropes and got some work done but was struggling with my sticky kneepads trying to slide off my knees. I realized that they were about to break and had to call it quits--the job would be impossible without them. Unfortunately, what little work I did is done very badly and I'll probably have to do it again. Think I'll have to wait a couple of months though--the fascias really need to be painted before I can do this. Kind of hard to explain in words.
Well, that about wraps it up. Obviously I have more painting, caulking and ridge-capping to do before the outside is truly done. But unless we get more warm weather, I am pretty much done with outside work until spring. But the house is water-tight enough to work on the inside stuff. I've tidied up in preparation. (You'd be amazed at how much junk accumulates.) But now it's time to turn this fancy barn into a house.
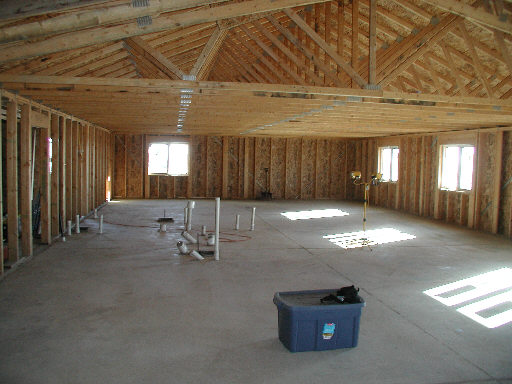
34. And as you can see, I have my work cut out for me!